Webhooks in Studio
About webhooks
Webhooks provide a way for the notifications to be delivered to an external web server whenever certain events occur in Studio. With webhooks, you can set a setting once that you want to hear about certain events or activities .
When you create a webhook, you specify a URL, and necessary information you want us to send to along with the events that you want to listen on Datachain. When the event occurs, Datachain Studio will send an HTTP request with the data about the event to the URL that you specified. If your server is setup to listen for webhook deliveries at that URL, it can take action when it receives one.
For example, you can subscribe your webhook to events that occur when a job is created, is complete, is failed, is running, and so on. You can then monitor whenever a job is failed through this webhook.
Alternative
As opposed to webhooks, you can also use CLI command to get the job information or some of our available API endpoints but webhook requires less effort than polling an API since it allows near real time updates.
Available event type
As of now, your server can receive two different types of events.
JOB
Whenever any job is created or any status is changed to the job, you will receive the JOB webhook event. The payload you get with the job webhook is as:
Header: http-x-datachain-event: JOB
Payload:
{
        "action": "job_status",
        "job": {
            "id": "da59df47-d121-4eb6-aa76-dc452755544e",
            "status": "COMPLETE",
            "error_message": "",
            "name": "job_query.py",
            "created_at": "2021-07-27T16:02:08.070557",
            "updated_at": "2021-07-27T16:22:08.070557",
            "finished_at": "2021-07-27T16:22:08.070557",
            "url": "https://studio.datachain.ai/team/TeamName/datasets/jobs/da59df47-d121-4eb6-aa76-dc452755544e"
        },
        "timestamp": "2021-07-27T16:22:08.070557",
        "text": "Job job_query.py (da59df47-d121-4eb6-aa76-dc452755544e) changed its status to COMPLETE"
    }
PING
Whenever you add your webhook to your team, Studio sends a PING event to check the delivery to the server. You can check the recent deliveries to check if the webhook is successfully connected.
Header: http-x-datachain-event: PING.
Payload:
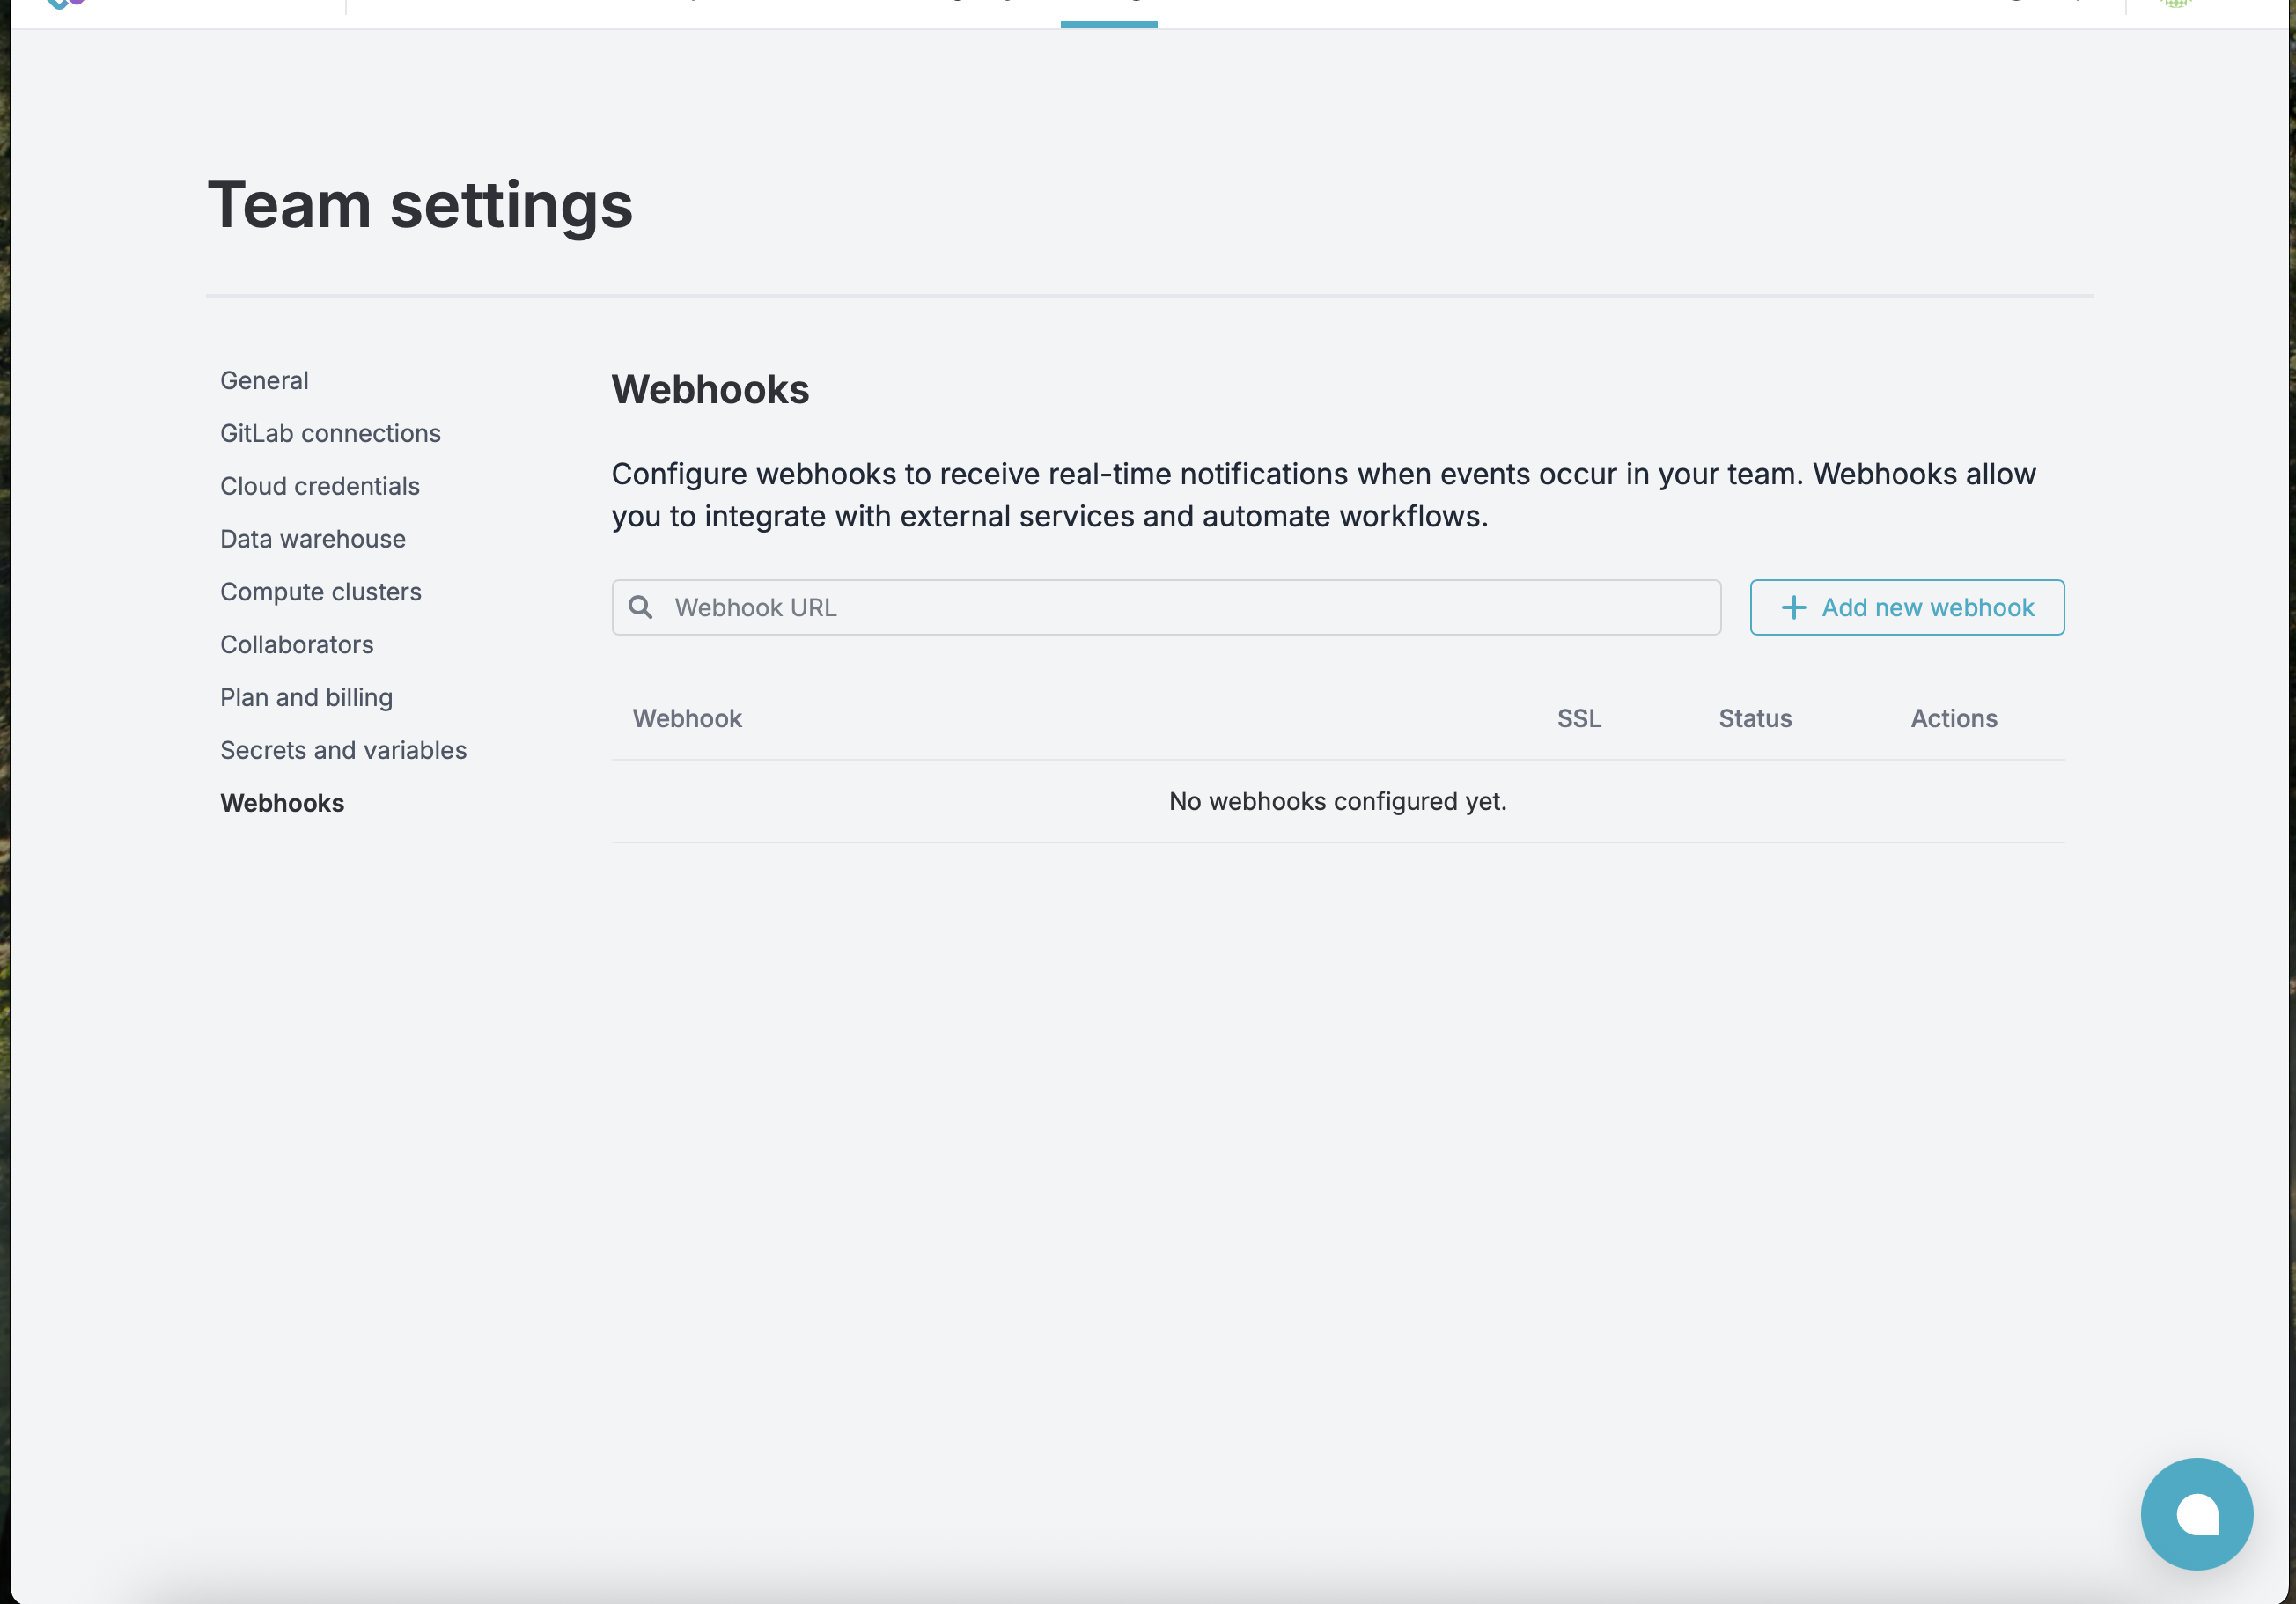
Creating webhooks
You should have admin access to a team to create the webhooks in the team. To create a webhook, go to settings for the team and under the section Webhooks, click on Add new Webhook.
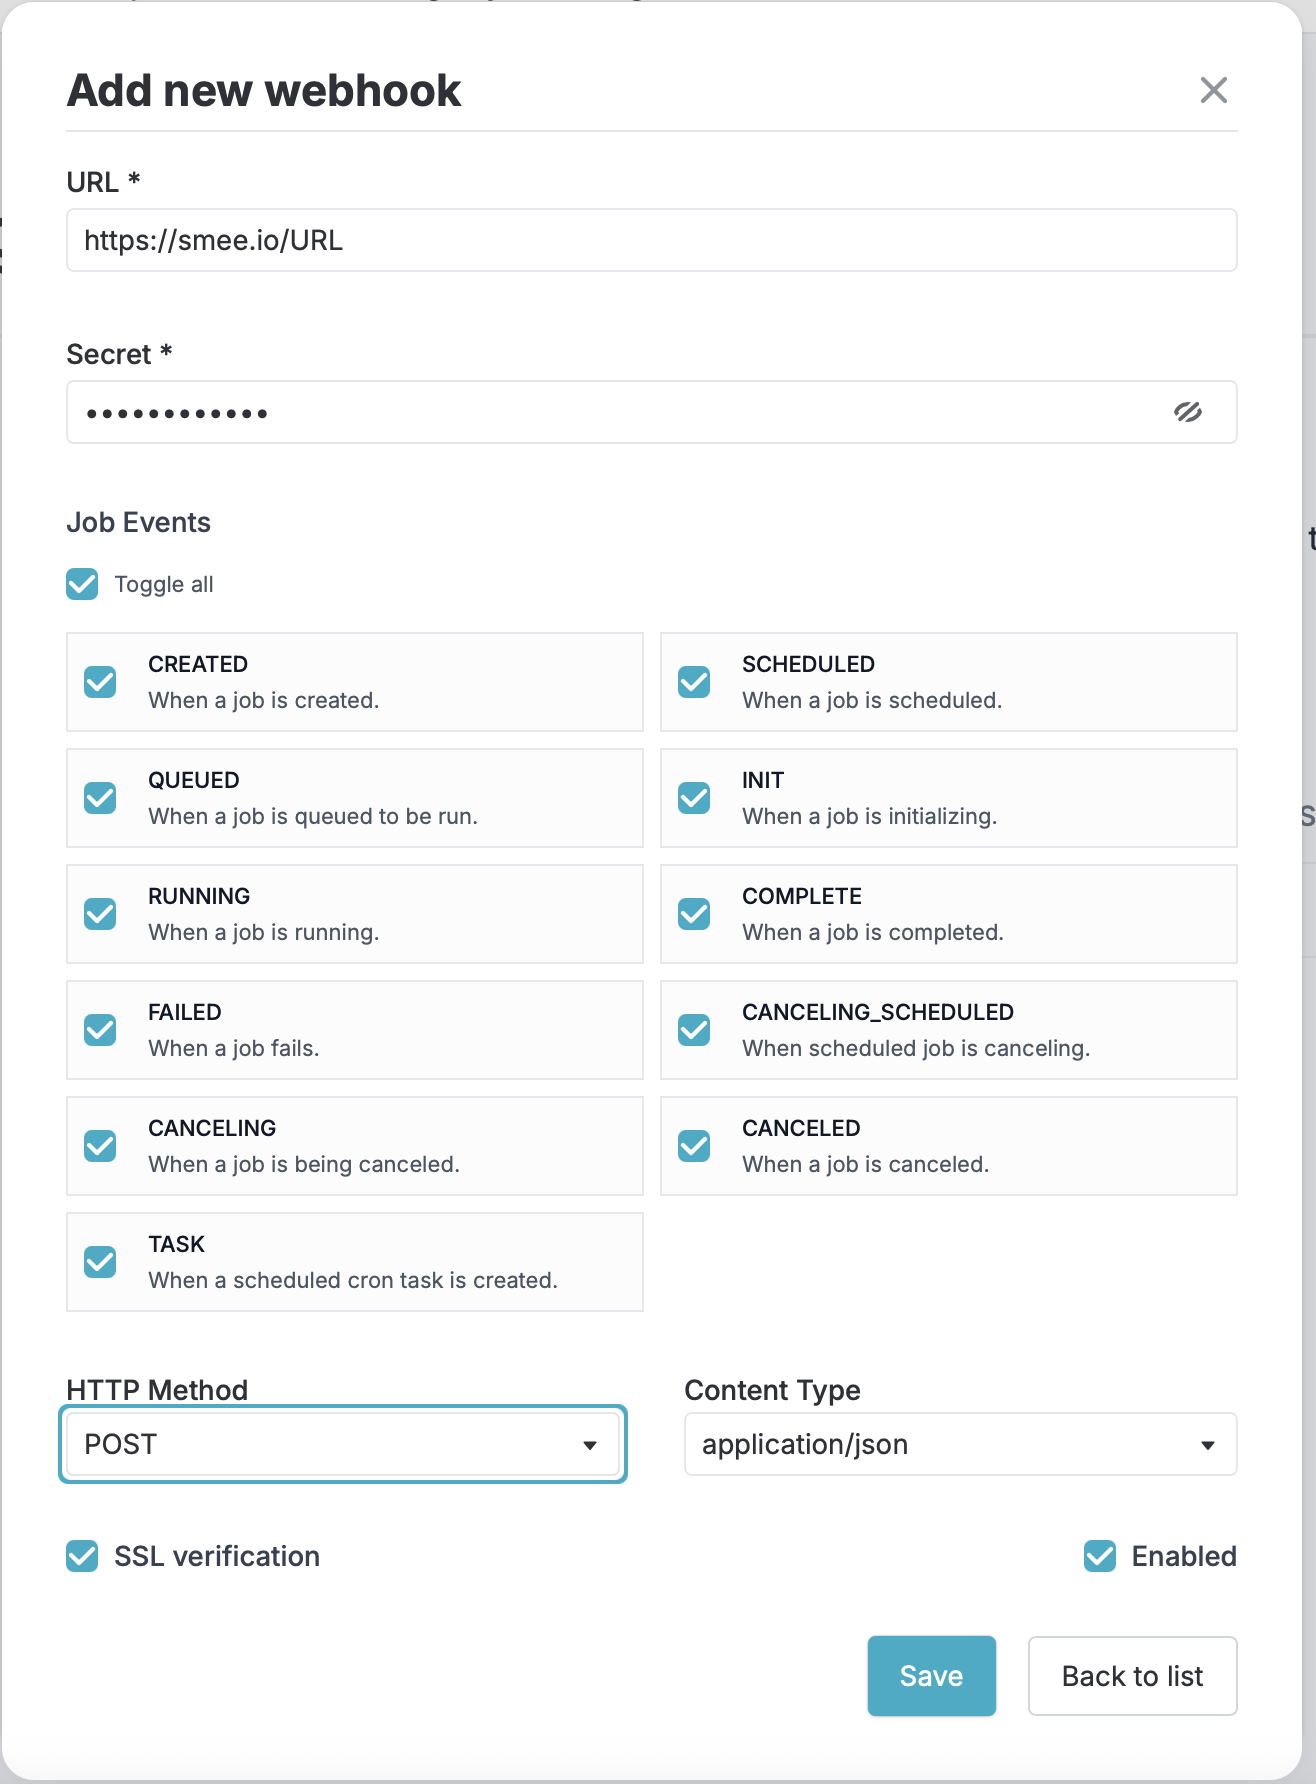
Enter the necessary information to create the webhooks.
- URL: Enter the valid URL where you’d like to receive the webhook payload in
- Secret: A string to use as a secret key. You should choose a random string of text with high entropy. You can use the webhook secret to validate incoming requests to those only originating from Datachain Studio.
-
Events: Under events, select the events you would like to trigger the webhook.
- JOB:
- CREATED: When a job is created but not yet scheduled to run
- SCHEDULED: Job has been scheduled to run
- QUEUED: Job is in the queue waiting to be processed
- INIT: Job is initializing (starting up)
- RUNNING: When a job starts running
- COMPLETE: Job has completed successfully
- FAILED: Job failed with error
- CANCELED: Job has been canceled successfully
- CANCELING: Job has been scheduled to cancel
- TASK: A scheduled task is created.
- PENDING: Job is in draft state for pipeline.
- JOB:
-
SSL Verification: By default, we verify SSL certificates when delivering payloads. SSL verification helps ensure that hook payloads are delivered to your URL endpoint securely, keeping your data away from prying eyes. Disabling this option is not recommended.
- HTTP Method: By default, we make a post request, but you can specify other http method if necessary.
- Content Type: Optionally, select the data format you want to receive the webhook payload in
- application/json will deliver the JSON payload directly as the body of the
POSTrequest. - application/x-www-form-urlencoded will send the JSON payload as a form parameter called
payload.
- application/json will deliver the JSON payload directly as the body of the
Handling webhook deliveries
When you create a webhook, you specify a URL and subscribe to event types. When any event that your webhook is subscribed to occurs, Datachain Studio will send an HTTP request with the data about the event to the event that you specified. If your server is setup at that URL, it can take action when it receives one.
Setup
In order to test your webhook locally, you can use a webhook proxy URL to forward the webhooks from Studio to your computer or codespace. We are using smee.io to provide a webhook proxy url and forward webhooks.
- Go to smee.io
- Start a new channel
- Copy the full URL under the webhook proxy URL. We will use this URL in the following setup steps.
- Install smee-client if it is not already installed using
npm install --global smee-client - To receive forwarded webhooks from smee.io, run the following command in your terminal. Replace the
WEBHOOK_PROXY_URLwith your webhook proxy URL from earlier.
- Keep this running while you test out your webhook. When you want to stop forwarding the webhooks, enter Ctrl + C
- Create webhook using the step as mentioned above or edit the one if you already have with the url from earlier.
- Write code to handle webhook deliveries
- Initialize your server to listen for requests to your webhook URL
- Read HTTP headers and body from request
- Take desired action in response to the request.
You can use any programming languages that you can to run on your server.
Example Code
Python
This example uses the Python and Flask libraries to handle the routes and HTTP requests.
To use this you must install flask library in your project. For example:
Create a python file with following contents. Modify the code to handle only the event types that your webhook is subscribed to as well as the ping event that Studio sends when you create a webhook. This example handles job, dataset and ping events.
# You installed the `flask` library earlier.
from flask import Flask, request

# This defines the port where your server should listen.
# 3000 matches the port that you specified for webhook forwarding.
#
# Once you deploy your code to a server,
# Change this to match the port where your server is listening.
port = 3000
secret = "secretString"

# This initializes a new Flask application.
app = Flask(__name__)

# This defines a POST route at the `/webhook` path.
# It matches the path you specified for the smee.io forwarding.
#
# Once you deploy your code to a server and update your webhook URL,
# Change this to match the path portion of the URL for your webhook.
@app.route('/webhook', methods=['POST'])
def webhook():
    # Respond to indicate that delivery was successfully received.
    # Your server should respond with a 2XX response
    # within 10 seconds of receiving a webhook delivery.
    # If your server takes longer than that to respond,
    # then Studio terminates the connection.

    # Check `http-x-datachain-event` header for the event type.
    datachain_event = request.headers.get('http-x-datachain-event')

    # You should add logic to handle each event type
    # that your webhook is subscribed to.
    # For example, this code handles the `JOB` and `PING` events.
    if datachain_event == 'JOB':
        data = request.get_json()
        action = data.get('action')
        if action == 'job_status':
            print(
                f"Job status for job {data['job']['id']} was" \
                " changed to {data['job']['status']}"
            )
        else:
            print(f"Unhandled action for the job event: {action}")
    elif datachain_event == 'PING':
        print('Ping event received')
    else:
        print(f"Unhandled event: {datachain_event}")

    return '', 202  # 202 Accepted status code

# This starts the server.
if __name__ == '__main__':
    app.run(host='0.0.0.0', port=port, debug=True)
    print(f"Server is running on port {port}")
To test the code, run the file using python FILENAME. Make sure that you are forwarding the webhooks in a separate terminal.
When you run a job in Studio, you will see some similar response as below:
Ping event received
Job status for job a852ee4a-091a-456f-ba1a-c809f7e804f3 was changed to CREATED
Job status for job a852ee4a-091a-456f-ba1a-c809f7e804f3 was changed to SCHEDULED
Job status for job a852ee4a-091a-456f-ba1a-c809f7e804f3 was changed to QUEUED
Job status for job a852ee4a-091a-456f-ba1a-c809f7e804f3 was changed to INIT
Job status for job a852ee4a-091a-456f-ba1a-c809f7e804f3 was changed to RUNNING
Job status for job a852ee4a-091a-456f-ba1a-c809f7e804f3 was changed to COMPLETE
Validating webhook deliveries
Once your server is configured to receive payloads, it will listen for any delivery that’s sent to the endpoint you configured. To ensure that your server only processes webhook deliveries that were sent by Datachain Studio and to ensure that the delivery was not tampered with, you should validate webhook signature before processing the delivery further.
Studio will use the secret you added when creating your webhook to create a hash signature that’s sent to you with each payload. The hash signature will appear in each delivery as the value of X-datachain-signature-256 header.
In your code that handles webhook deliveries, you should calculate a hash using your secret token and compare the hash Studio sent with the expected hash that you calculate and ensure they match.
Notes:
- Studio uses HMAC hex digest to compute the hash
- The hash signature always starts with
sha256= - The hash signature is generated using webhook’s secret token and payload contents.
- Never use a plain
==operator. Instead consider using a method likesecure_compareorcrypto.timingSafeEqual, which performs a "constant time" string comparison to help mitigate certain timing attacks against regular equality operators, or regular loops in JIT-optimized languages.
Updating the example above:
import hashlib
import hmac
from flask import abort

def verify_signature(payload_body, secret_token, signature_header):
    """Verify the payload was sent from Studio by validating SHA256.

    Raise and return 403 if not authorized.

    Args:
        payload_body: request body to verify (request.body())
        secret_token: Studio webhook token (WEBHOOK_SECRET)
        signature_header: header (x-datachain-signature-256)
    """
    if not signature_header:
        abort(403, "X-datachain-signature-256 is missing!")
    hash_object = hmac.new(
        secret_token.encode('utf-8'),
        msg=payload_body,
        digestmod=hashlib.sha256
    )
    expected_signature = "sha256=" + hash_object.hexdigest()
    if not hmac.compare_digest(
        expected_signature, signature_header
    ):
        abort(403, "Request signatures didn't match!")
Add the following call in the api receiver.
# Get the signature header
signature = request.headers.get('X-Datachain-Signature-256')

# Re-enable signature verification with improved JSON handling
if signature:
    verify_signature(request.get_data(), secret, signature)
else:
    print("Warning: No signature header found")
Slack Integration
You can use this webhook feature to send a message to slack as well. To integrate slack with Studio,
- Using the guide as described in Slack documentation , create an incoming webhook and copy the webhook address in the following format
https://hooks.slack.com/services/T00000000/B00000000/XXXXXXXXXXXXXXXXXXXXXXXX. - Use the address to create a webhook in Studio as described above
- You should now be able to view the message in Slack channel connected.
Best practices for using Webhooks
- You should only subscribe to the webhook events that you need. This will reduce the amount of work your server needs to do.
- The webhook secret should be a random string of text with high entropy. You should securely store your webhook secret in a way that your server can access.
- You should ensure that your server uses an HTTPS connection. By default, Studio will verify SSL certificates when delivering webhooks. Studio recommends that you leave SSL verification enabled.
- Your server should respond with a 2XX response within 10 seconds of receiving a webhook delivery. If your server takes longer than that to respond, then Studio terminates the connection and considers the delivery a failure.
- Check the event header and action type before processing the event.
- Make sure the endpoints are idempotent meaning if multiple requests for same event is received, the server should handle this.
- Datachain Studio may deliver webhooks in a different order than the order in which the events took place. If you need to know when the event occurred relative to another event, you should use the timestamps that are included in the delivery payload.
- Consecutive 10 failures to webhook will disable the webhook deliveries.